|
Filters are an important part of the Urban Jungle Photo Editor experience. There are dozens of different filters to choose from in the Urban Jungle application. Adding filters to your images can cut down editing time and be a convenient way to add finishing touches to your art piece. In this blog post, we will be showcasing our Neon-style family of filters. To open the filter selection menu, click on the Filters tab at the bottom right. 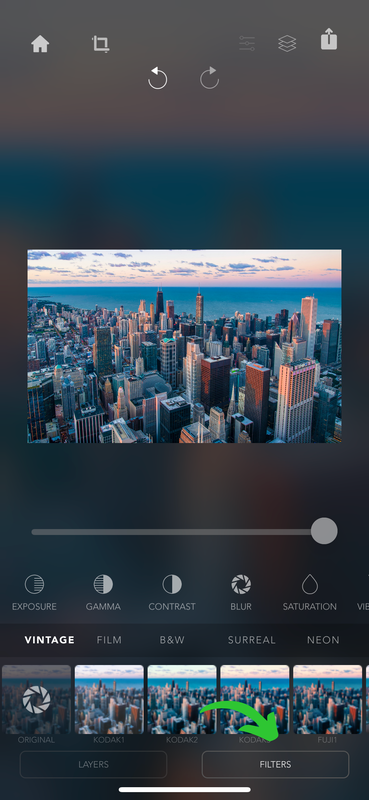 The first style of filter in the Neon Family is called Cyborg. This filter is a little intense with the high contrast pinks and sky blue. It is a really great to give a retro cyberpunk vibe. 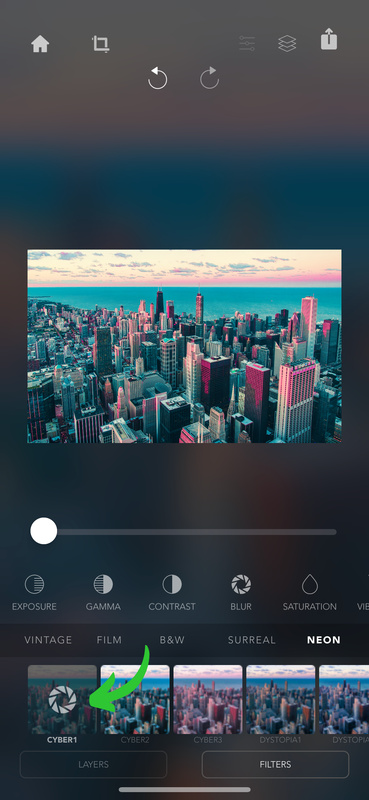 The second style is called Dystopian. And as the name suggests, a dystopian filter gives a dark and gloomy effect to the picture. The oranges are more prominent in Dystopian. 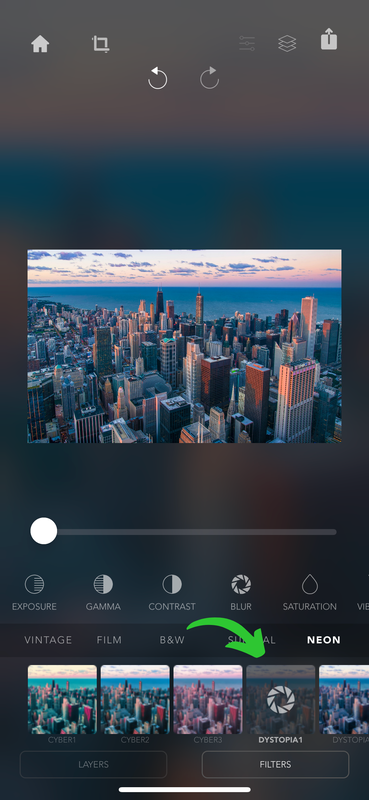 The last style is called Neon. It is a kind of mix between Cyborg and Dystopian, blending the shocking pink with oranges of the dystopian. It does give a look of something being illuminated by neon lights. 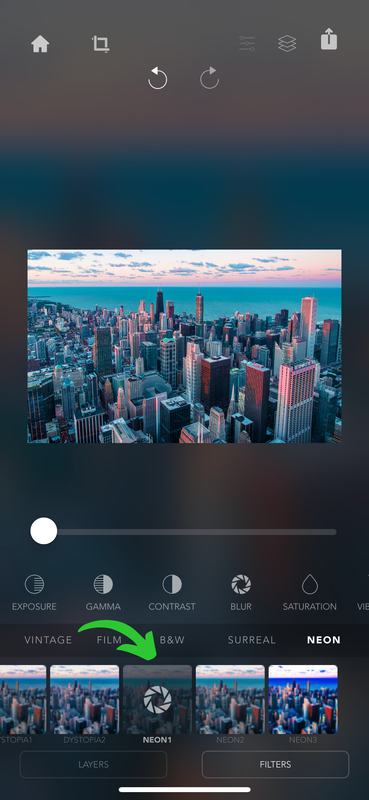 Urban Jungle Photo Editor has plenty of other features to explore. This was just a small glimpse into the world of filters in the Urban Jungle Photo Editor Application.
Follow us on Facebook and Instagram to be the first ones to hear about exciting new features coming to the Urban Jungle Photo Editor.
0 Comments
Are you shopping around for a new Photo Editor? Are you looking for a powerful yet easy-to-use application to make those iPhone pictures into something creative? Well, the Urban Jungle Photo Editor is your gateway into the world of Photo Manipulation and Photo Art. Let us briefly go through the things that make the Urban Jungle Photo Editor great.When you power up the Urban Jungle application, you will be greeted with the home screen. You can either start a new project or continue an old one you were working on from here. 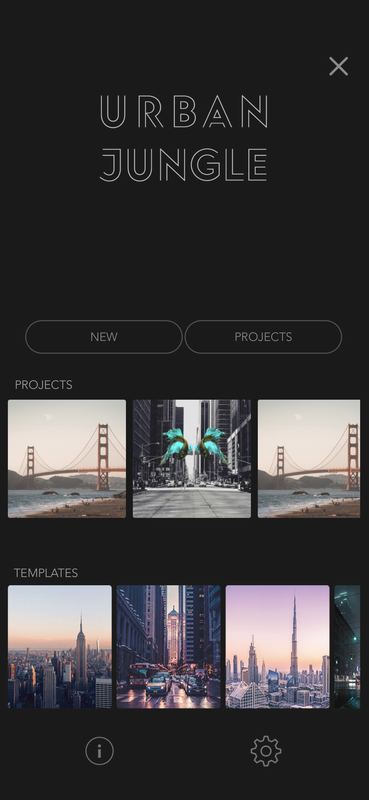 Urban Jungle Photo editor offers dozens of landscape templates to begin your photo art journey. Just click on any one of the templates and scroll through all the templates Urban Jungle offers. 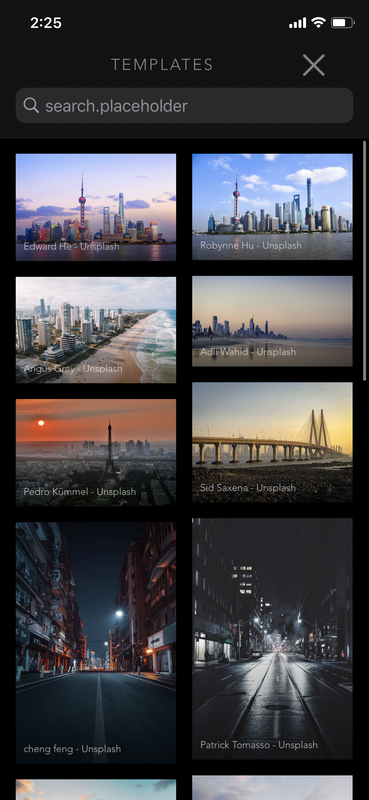 After selecting the template, you will be taken to the editing screen. Here you can crop the image or start importing objects from our extensive library of objects. 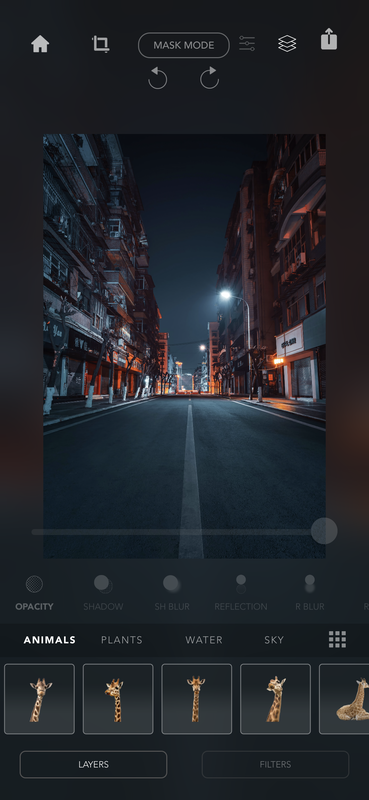 By clicking on the grid icon on the bottom right, you can expand the object menu. Explore through different objects like Animals, Plants, and even celestial objects to place on your photo. 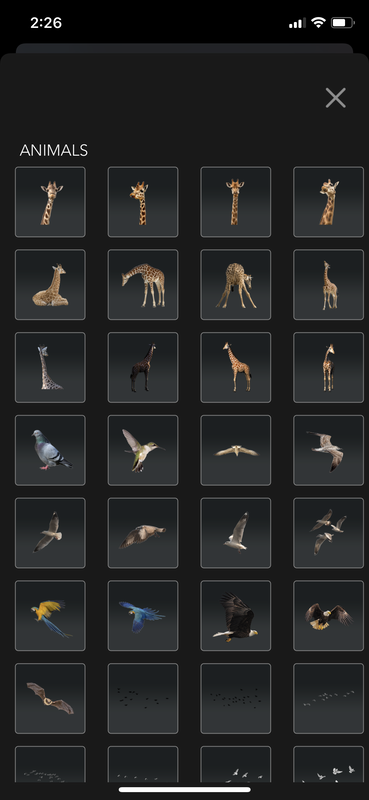 Urban Jungle Photo Editor also has a very intuitive layer management menu. You can use this to adjust the objects as layers and place things in front or behind each other. It also allows you to try different blend options. The blend is how an object interacts with its background. 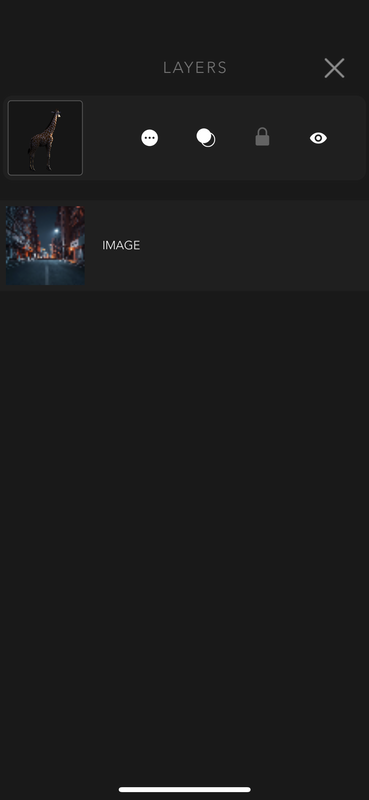 Urban Jungle Photo Editor also comes with dozens of different types of premade filters that you can use on your pictures. But if you want to be creative yourself, in that case you can always use the powerful editing tools in the Urban Jungle Photo Editor and make your own filter. 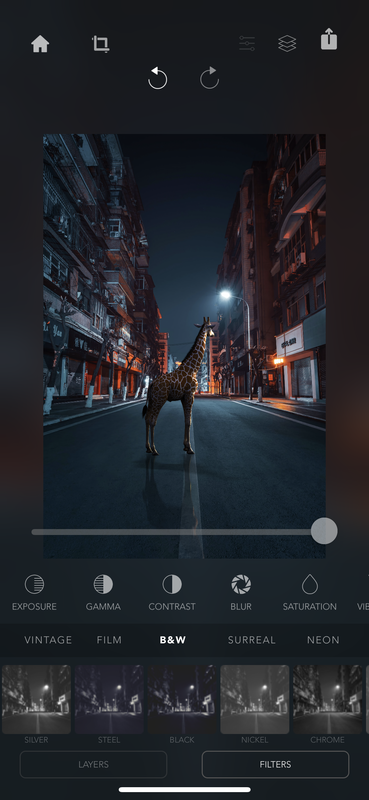 Finally, you can directly save it or import the project to your gallery when you are done with your art piece. 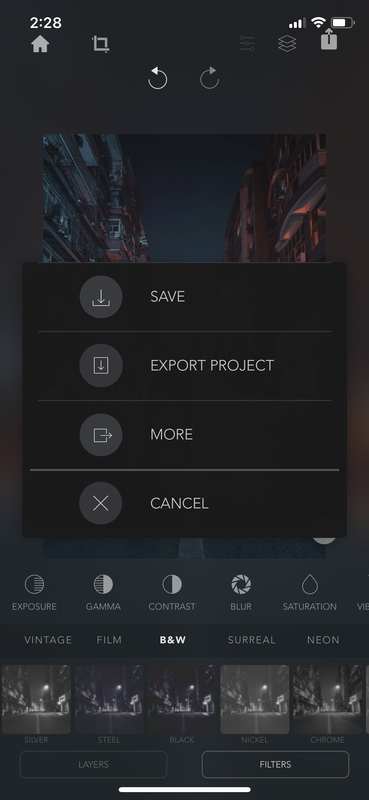 In this week’s blog, we will be looking at the Surreal family of filters in the Urban Jungle Photo Editor. We can start by opening the filter tab at the bottom right. 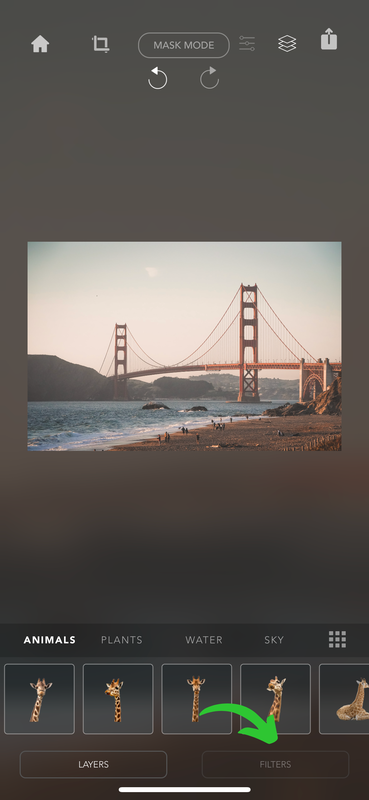 The first filter in the surreal section is called the negative. As the name says, it gives a negative photo reel feel to our image. 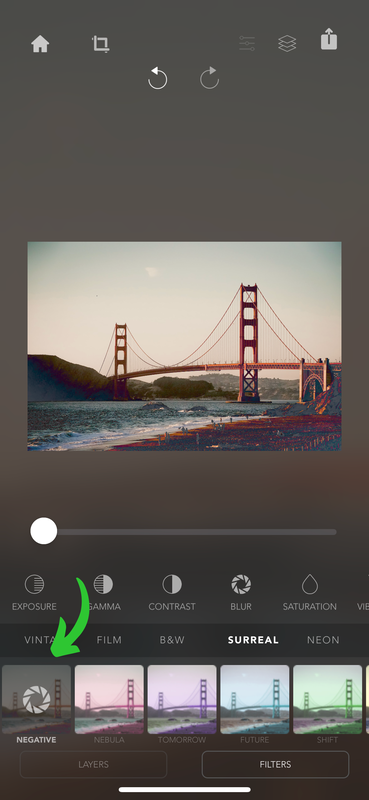 The second filter is called Nebula. It is a blend of pinkish and aqua hue. 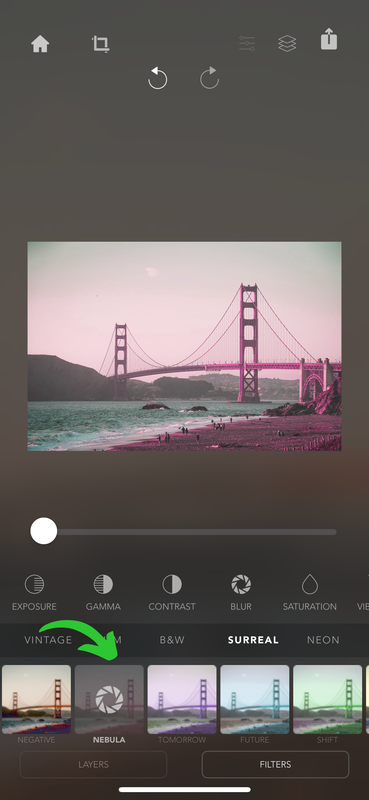 Next comes the tomorrow filter. It has a more neon purple and green tint to it. 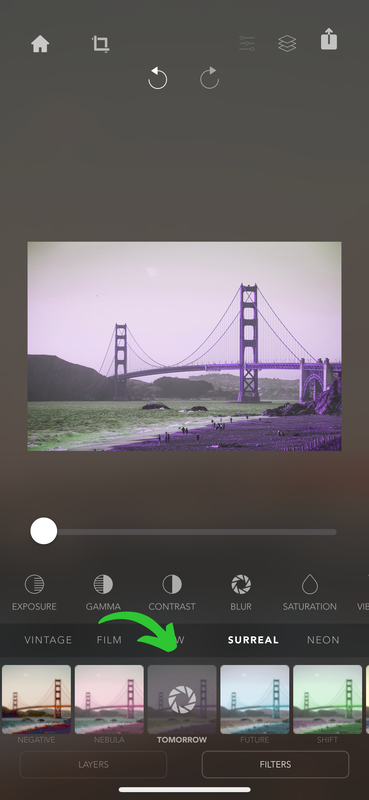 The future filter has a very rustic neon blue and brown tint to it. 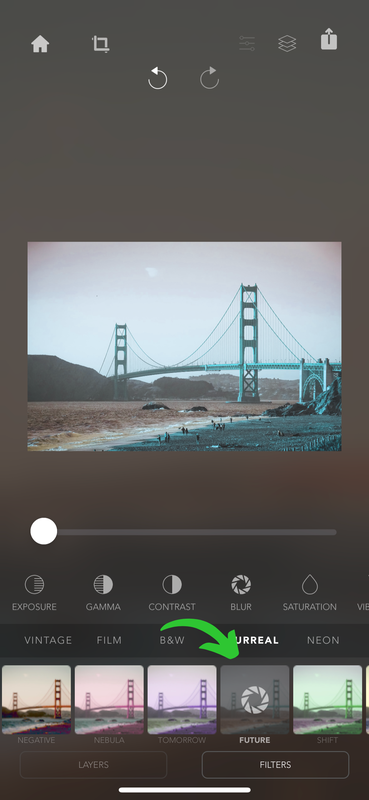 The next filter is called shift, this filter has a green. 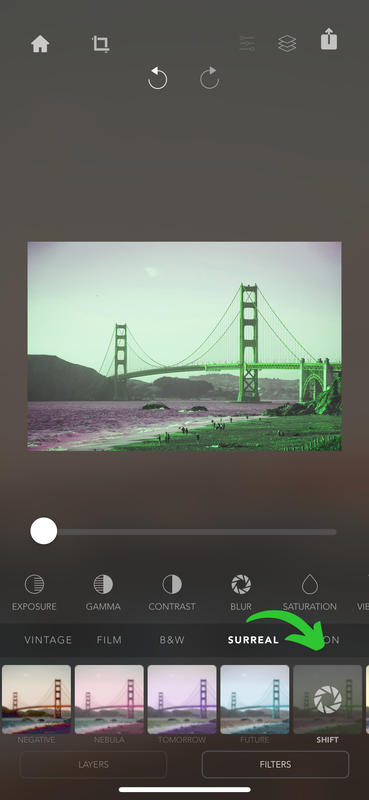 The wrap is a perfect contrasting blend of yellow and a very deep blue. 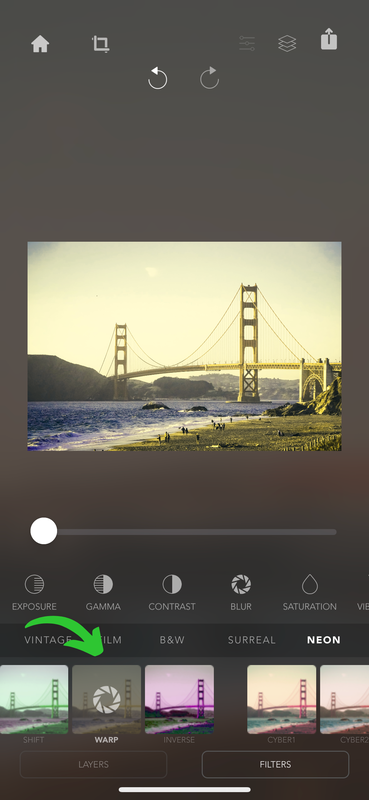 The inverse filter reverses the colors in the image. This gives a dark and bleak effect. 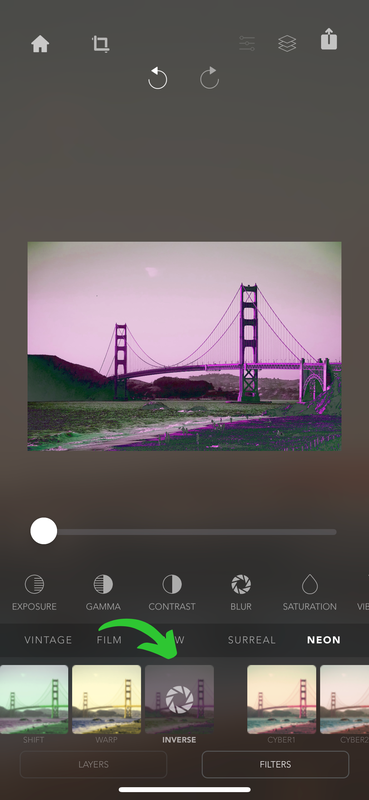 In this week’s blog, we thought it would be fun to do another brief editing guide on the Urban Jungle Photo Editor. Let us start by opening the object menu by selecting the grid icon on the bottom right. 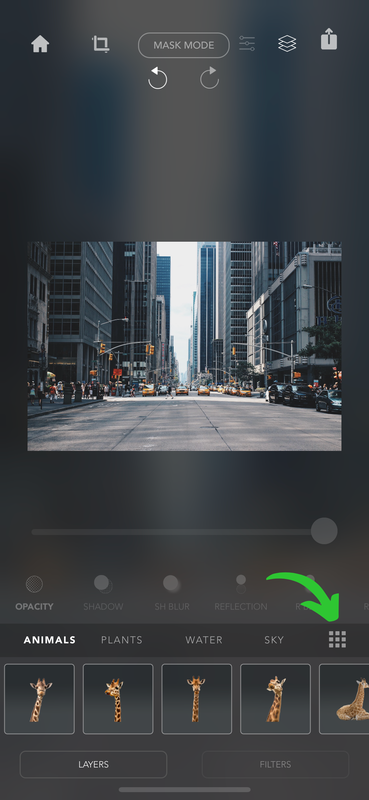 Then we can select this fish and import it to our cityscape by clicking on it.  Use the reflection slider to remove the reflection under the fish. 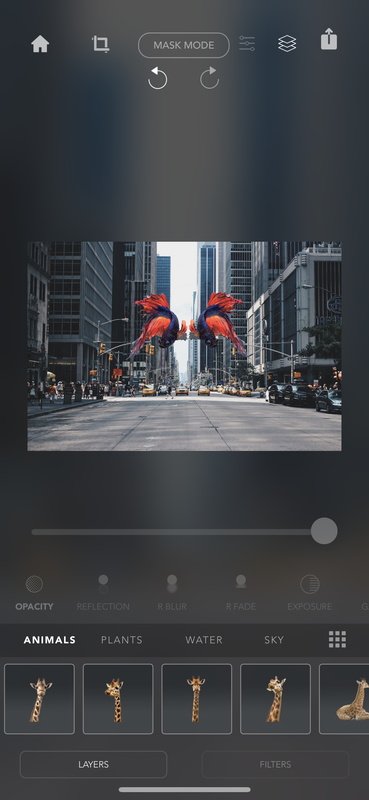 Repeat the process again to add another fish. But this time we can flip it to create a mirror opposite. 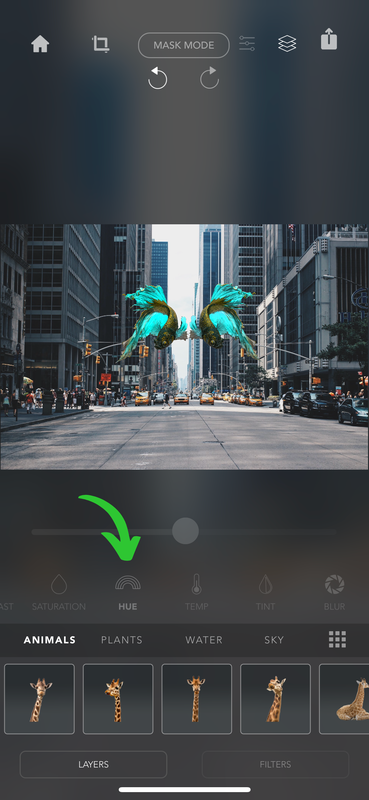 Now we can adjust the hue for both these fishes. I am aiming for a teal look; you can find it at the 50 mark on the slider. To really highlight our fishes, let us add a dark black and white filter to the background cityscape. 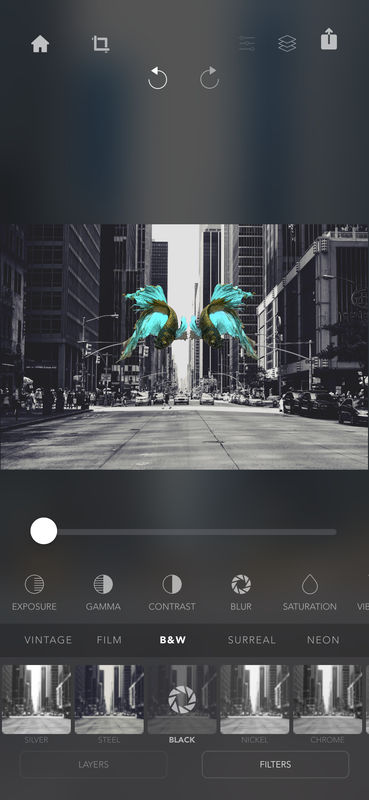 To add the final touch, we are again going to go into the object menu and find the sky category. And choose a sky full of stars. We can then import that object onto our project and expand it to the whole image. We can make it less transparent by using the transparency slider until the stars just give a subtle look to the image. 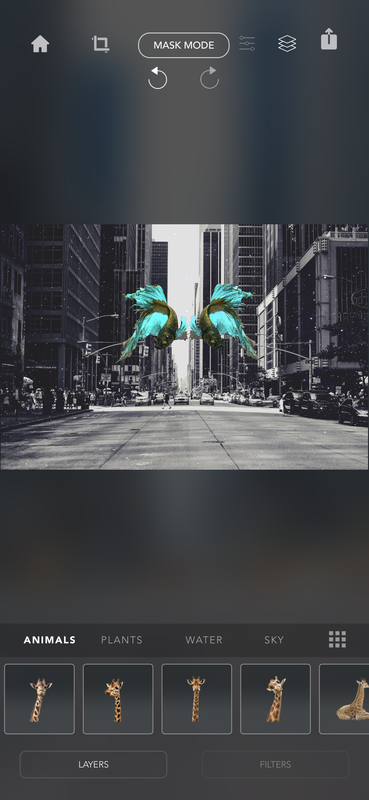 Urban Jungle Photo Editor is designed from the ground up to be a convenient photo editing experience. One of the exciting features of the Urban Jungle Photo Editor is its selection of curated filters. These filters offer an easy way to set the tone with your artwork. With the Film styled filters, we aimed to bring motion pictures to your devices. Now you can easily give those classical Hollywood look to your pictures as well. We can open the filter menu by selecting the filter tab at the bottom. Select the Film category to open up different filters that you can play around with. 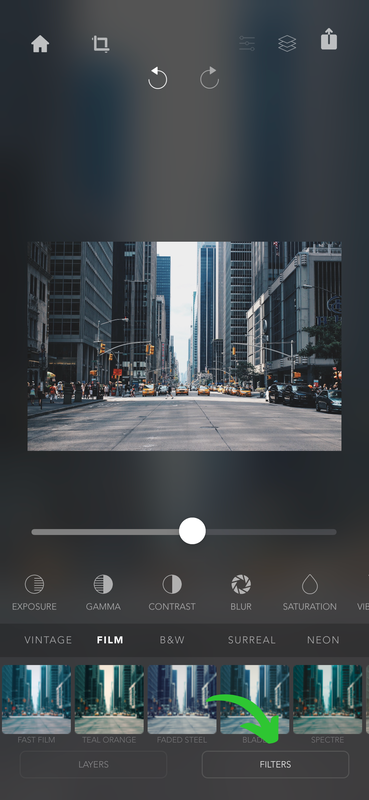 The first filter is called the Fast Film. It has a really punchy dark blue floor palette to it. Really great to give a feel of a cold winter morning. 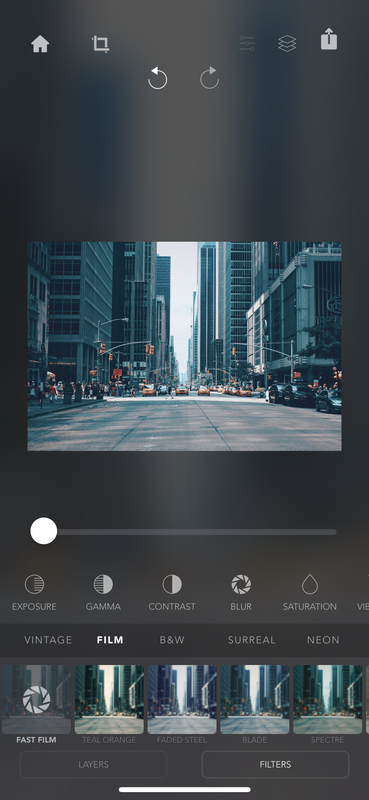 The second filter Teal orange goes in a different direction. It has a really orange feel to it. It gives a perfect look for a warm summer sunset. It has an overall warm temperature to it. 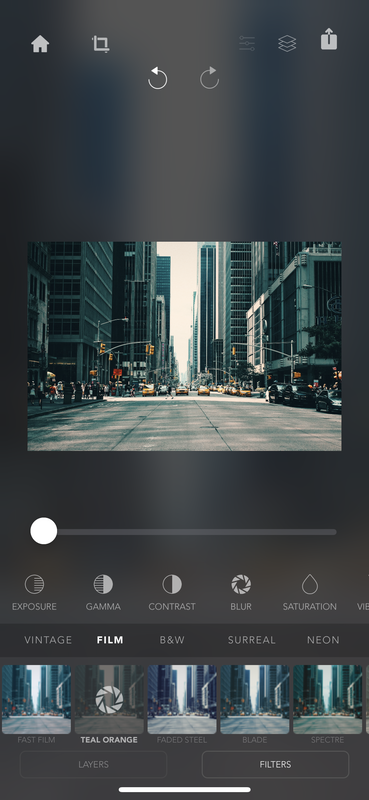 Faded steel gives a very steely look to the image. This filter does have blue undertones to it but unlike the Fast Flim, this one is brighter and jollier to look at. 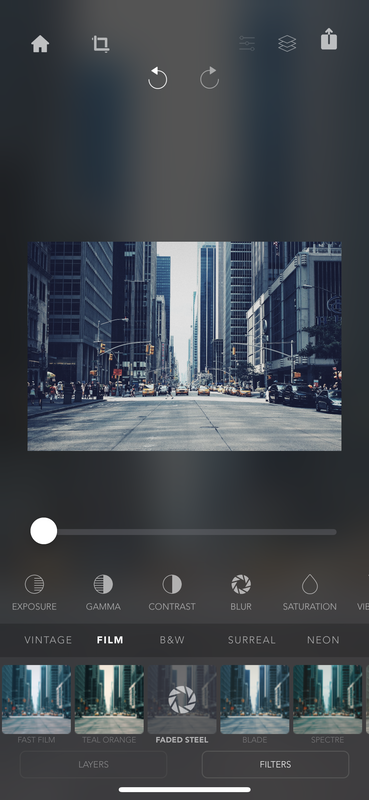 The next filter Blade is very similar to the faded steel filter but emphasizes more on the blues and takes out all the reds. 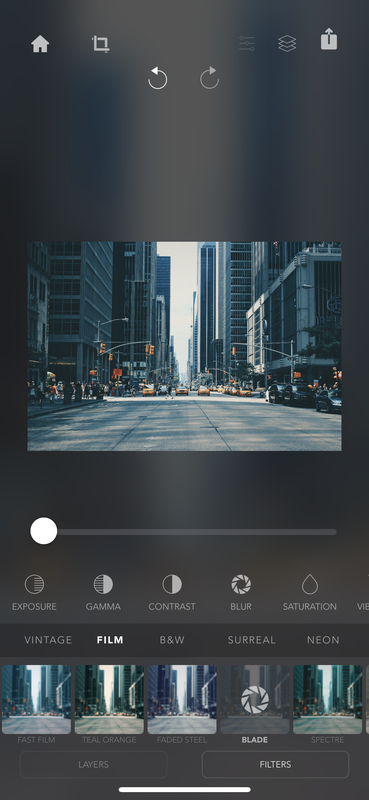 The Spectre stands out from all the other Film filter categories because it adds a greenish tint to the whole thing. The result is an aqua-green color cityscape. 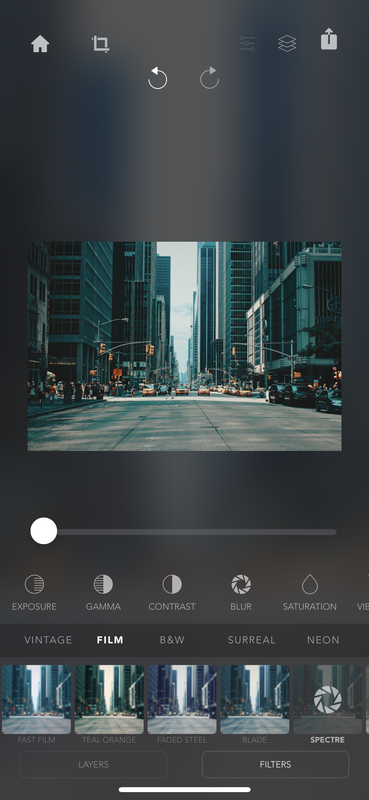 The Panavision is inspired by the motion picture company Panavision that makes the cameras that bring Hollywood to life. This filter gives of a yellow and orange tint, with really dark undertones. As compared to faded steel, this look is much darker.  This concludes our showcase for the Film category of filters.
Use the hashtag #urbanjungleapp and post your art on Instagram to get a chance to be featured on your Instagram page. Follow us on Facebook and Instagram to be the first ones to hear about exciting new features coming to the Urban Jungle Photo Editor. The Urban Jungle Photo Editor just added new cold-blooded animals to the layers section. Reptiles were added to the Urban Jungle Photo Editor in last month’s update. Let’s take a brief look at the latest addition to the Urban Jungle animal family. First, click on the grid icon to expand the layer menu. 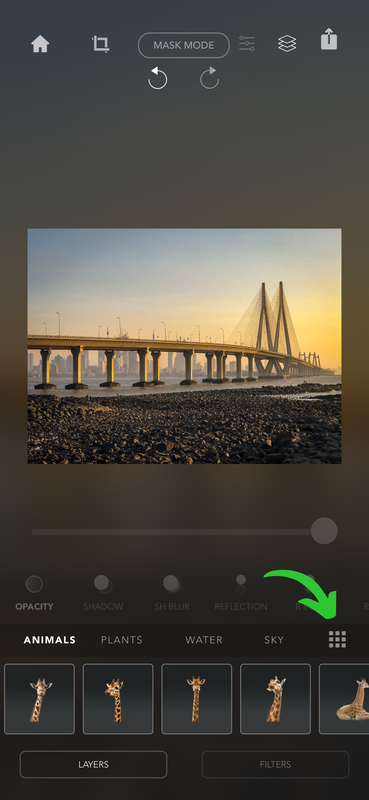 Now using only one finger, drag downward to scroll towards the bottom. At the end of the animal, the section is our full assortment of these beautiful cold-blooded creatures. We have Snakes, Crocodiles, and even a Komodo Dragon. 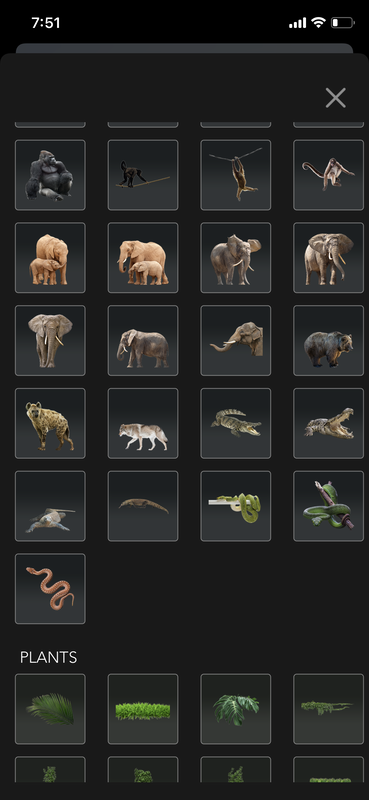 I like the yawning crocodile, select any animal by clicking on them once. Once you import them to your project, you can pan them around by dragging two fingers across the screen. 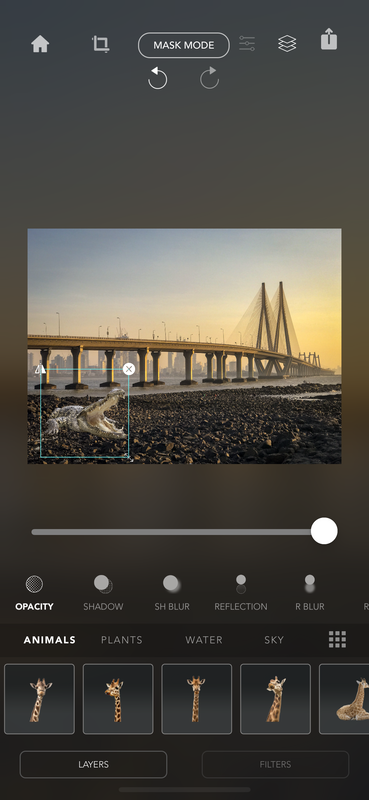 The crocodile seems a little out of place in the sunset environment. He is too blue for the scene. We can fix this by going scrolling left on the layer menu and going to the light temperature tool. And then we add a little hue to the crocodile to make him feel right at home. 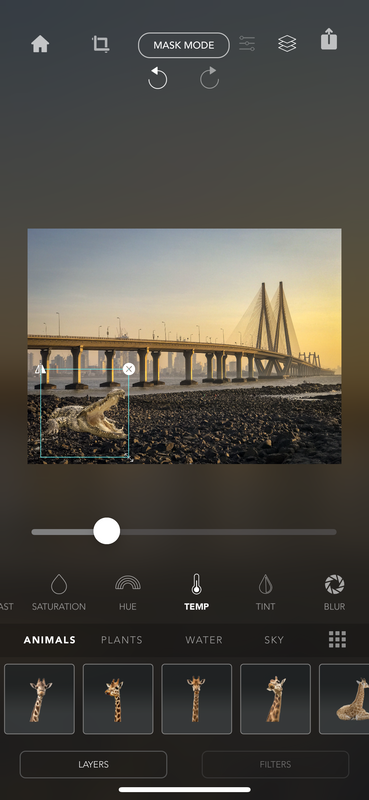 Be sure to try out the new reptilians in the Urban Jungle Photo Editor app.
Follow us on Facebook and Instagram to be the first ones to hear about exciting new features coming to the Urban Jungle Photo Editor. Use the hashtag #urbanjungleapp and post your art on Instagram to get a chance to be featured on your Instagram page. The new Urban Jungle Photo Editor update is now live! Update your App to receive the new ‘Cities’ category in the layer menu. Let us take a brief sneak peek into the new Cities category for the layers. As always let us start with selecting our project template for the landscape. Let us do something with this beautiful beachfront right here. 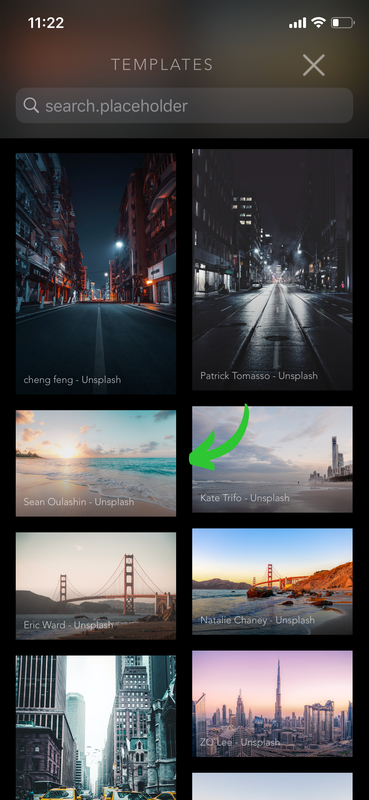 Once you have selected the landscape, select the layers menu by clicking on the tab at the bottom left of your screen. Then click on the grid icon on the right as shown in the image below. 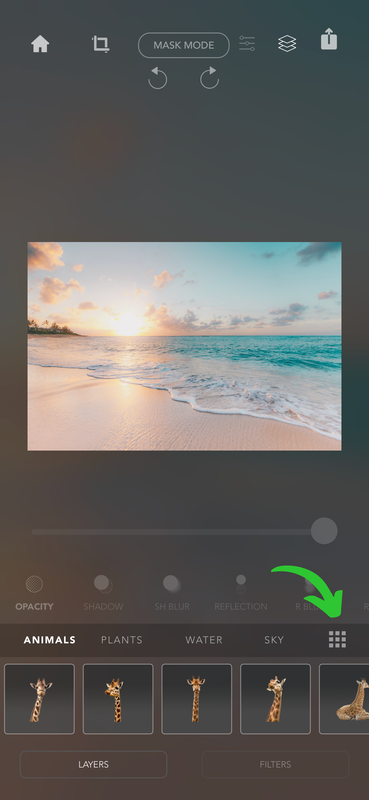 Scroll all the way down towards the bottom inside of the layers menu till you see the Cities category. This category has some beautiful cityscape layers that you can use in your pictures. Let us select the first one. 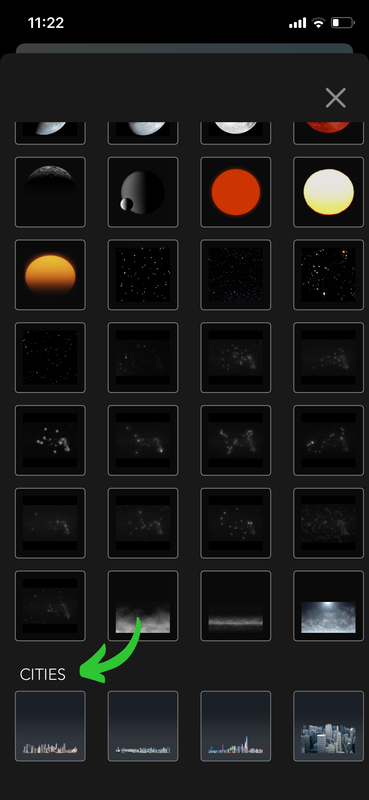 We can move around the cityscape layer as we would any other layer. Use two fingers to pan the layer around. We can also zoom the layer in and out while using one finger to drag the layer. Let us place it at the end of the horizon. 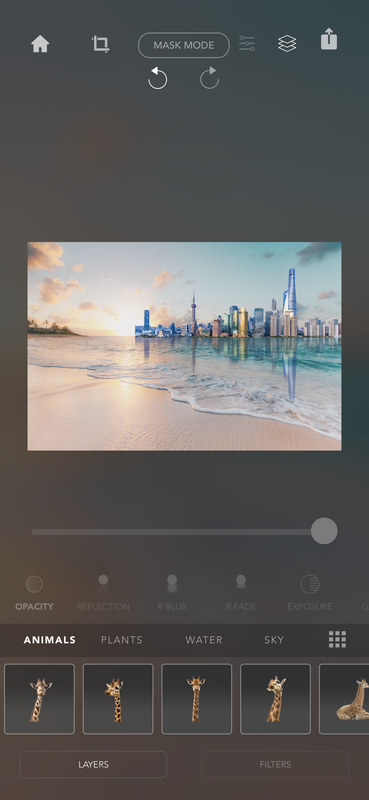 Use two fingers to pan the layer around, while dragging with one finger will zoom the layer in and out. Let us place it at the end of the horizon. We can even add more city landscapes and fill our horizon for this beachfront city look. 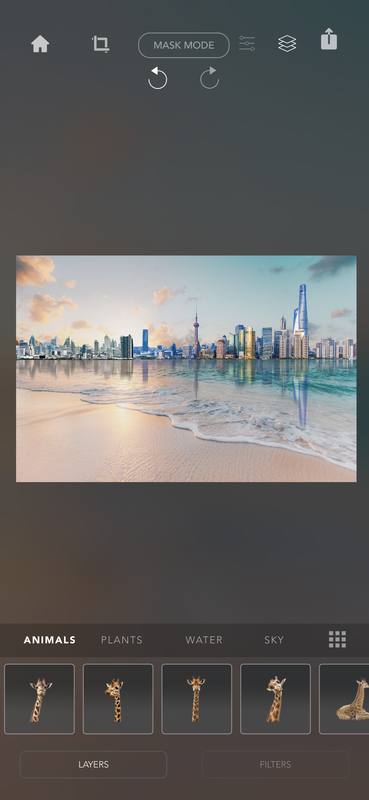 Be sure to check out the new and improved version of the Urban Jungle Photo Editor. Follow us on Facebook and Instagram to be the first ones to hear about exciting new features coming to the Urban Jungle Photo Editor.
Use the hashtag #urbanjungleapp and post your art on Instagram to get a chance to be featured on your Instagram page. Filters add an important dimension to the picture whenever you are editing. Filters enhance the message you are trying to give with your art piece. Selecting the perfect filter for your image can be a pretty vital step of Photo editing. In this week’s blog, we will be taking a look at some of the selection of filters Urban Jungle Photo Editor offers. We can go into the filter menu by selecting the filter tile at the bottom of the screen. 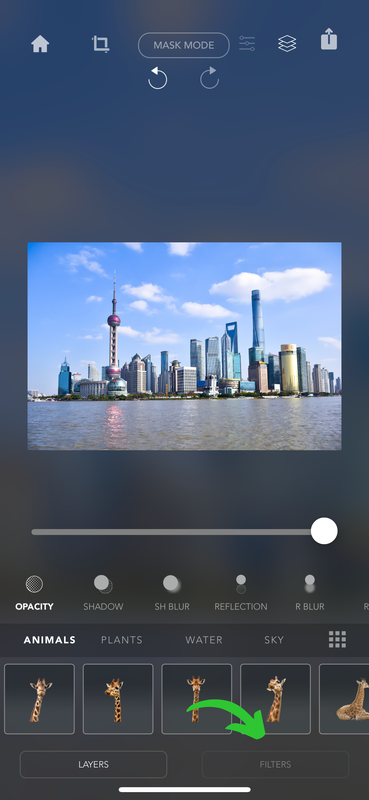 The filters are further divided into categories based on a theme. The first one called vintage has filters with some damp saturation and hue-y glow to them. They are supposed to give the image an old vintage and rustic look. The first filter in the vintage is called the Kodak 1. This filter really increases the whiteness of the image and also adds a little pink hue-y tint to it. 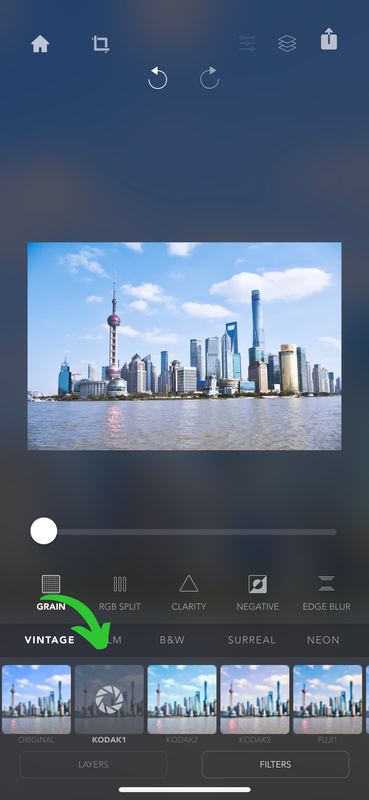 The second one is called Kodak 2 takes the whiteness down a little bit as compared to the last filter. It also has more of a yellowish hue to it. 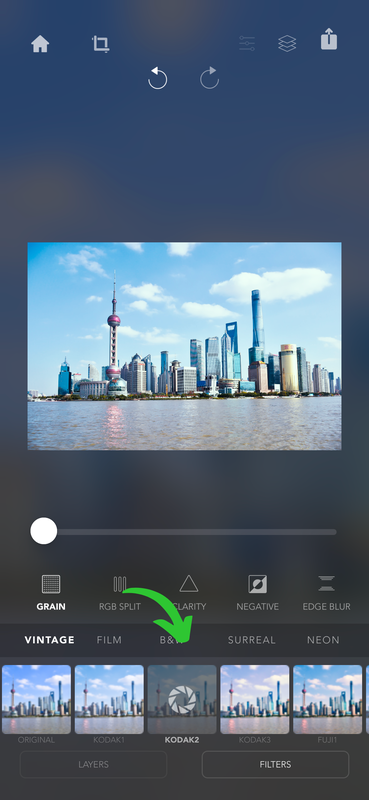 Kodak 3 is the more exuberant of the 3 in the Kodak lineup. It has more of a blueish and indigo touch to it. 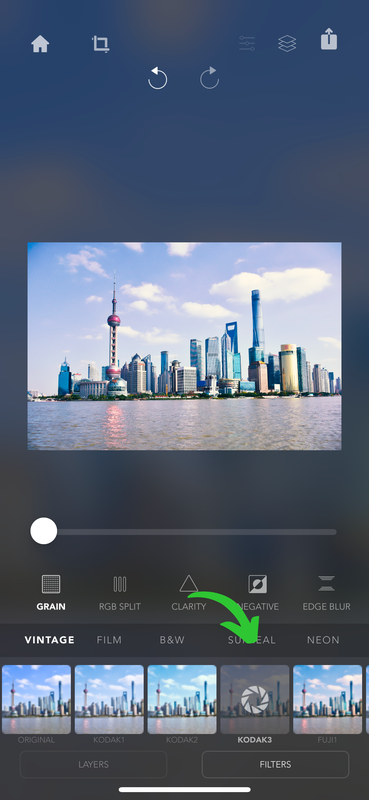 This concludes the Kodak family of filters in the Vintage section. We might look at other filter collections in a future blog post so follow us on Instagram and Facebook to get notified whenever we upload a new blog post.
Use the hashtag #urbanjungleapp and post your art on Instagram to get a chance to be featured on your Instagram page. With this week’s blog post, we will be looking at the how-to guide to make your cityscape have the 70s and 80’s inspired retro look. We will be using the Urban Jungle Photo Editor to make your cityscape look retro. Let us start by selecting a template for our retro-inspired piece. I like this dark empty street. 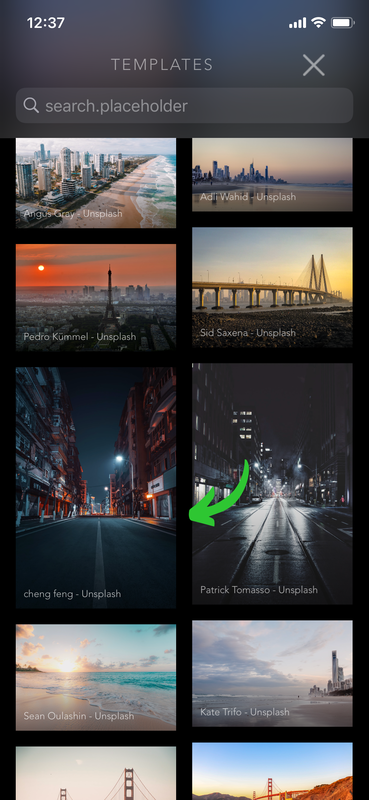 Let us also add a frog from the object menu to give our piece a magical feel. 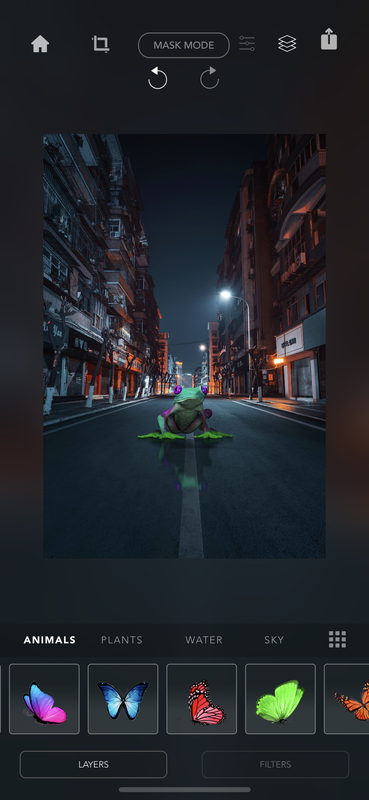 The first step is to go into the filters menu by selecting ‘filter’ from the tiles at the bottom of the screen. This will open up the filter’s menu. We’ll notice this menu has both pre-made filters and custom tools to mix and match our liking. Select the RBG Split tool and slide it towards the far right. You can adjust the RGB splitting effect to your liking as well. 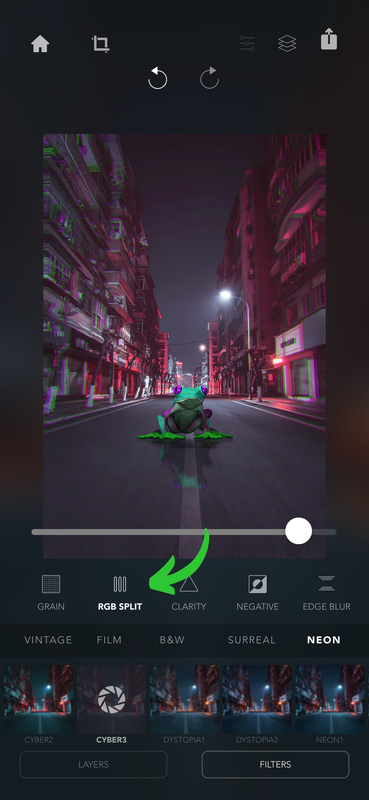 Now let us add a little edge blur to our cityscape. We can do that by selecting the edge blur tool and sliding it to the right, till we have the perfect amount of blurry effect on the edges of the frame. 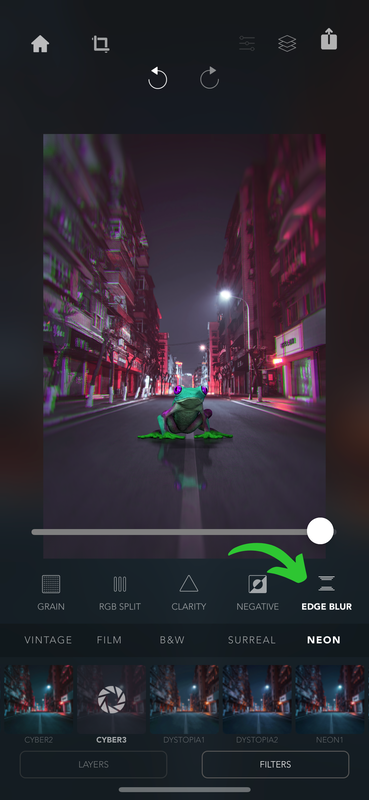 To finish it off, let us add some grainy texture to our piece. Select the grain filter from the menu and add a slide it a little towards the right to add the grain effect to the image. 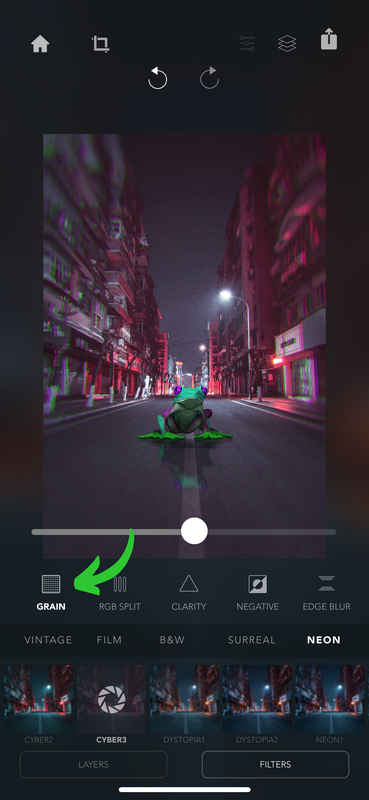 Our retro frog on the street piece is now ready to be posted on Instagram!
Follow us on Instagram and Facebook to get notified whenever we upload a new blog post. Use the hashtag #urbanjungleapp and post your art on Instagram to get a chance to be featured on your Instagram page. When editing a photo, you have hundreds of different styles and inspirations to choose from. In fact, it can be pretty intimidating for someone just starting out in the photo editing space. In this blog, we will be taking a look at how to create a Noir effect of your clicks using the Urban Jungle Photo Editor. Let us begin by first selecting a template landscape that we will be working with. You can choose any picture you have taken as a landscape for this project. 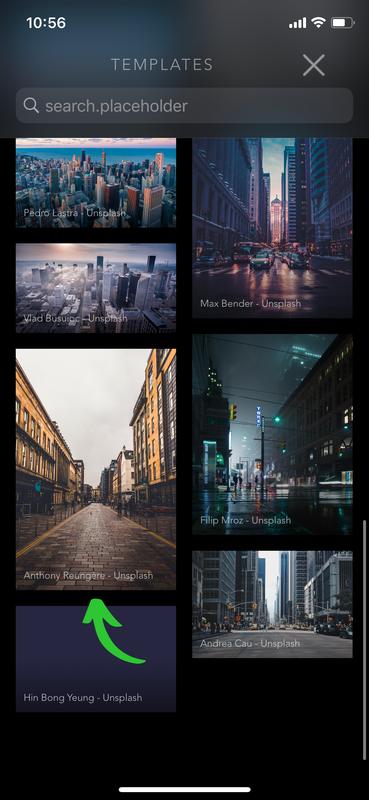 Let’s add an object to this landscape. We will import an ominous-looking elephant walking towards the camera.  Once we have added an object, let us first start by editing the object. Since we are doing a Noir effect, we will first reduce the saturation of the elephant to remove its color. We can further play around with gamma and brightness to get the perfect look we want from our Noir elephant. 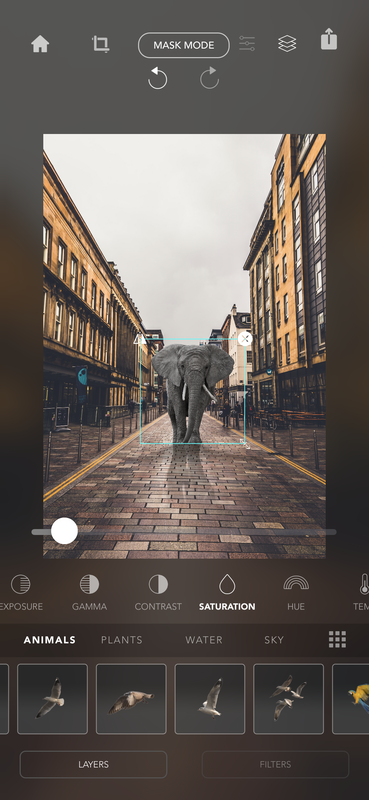 After we have completed the look of the elephant, we will now focus on the street behind him. We can hide the elephant for now using the layer menu. Urban Jungle Photo editor has a whole section on Black and White filters. We will just select a pre-made filter using this menu. You can also instead play around with the filter tools to customize the filter looks. 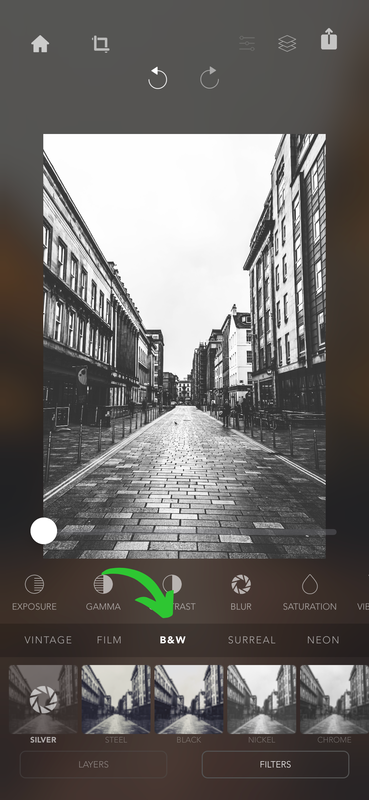 For this project, let us go with the Silver B&W filter. It gives a metallic look and will fit nicely with our elephant. Once you are satisfied with how your landscape looks, you can bring back all your objects using the layer menu. 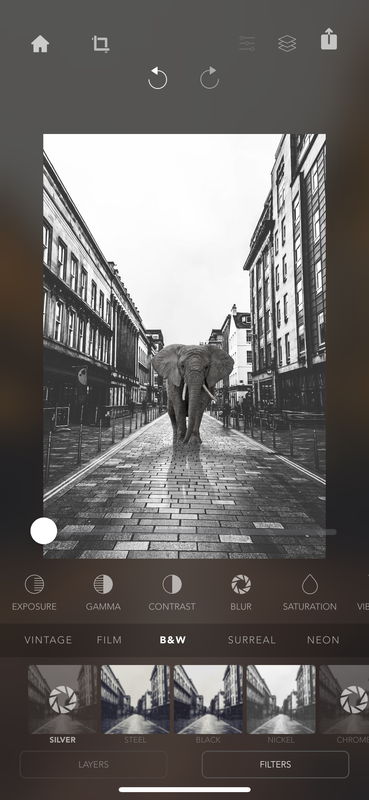 |
Follow |
Urban Jungle |
|